
Your latest Node.js content, news and updates in one place.

To understand Workers, first, it’s necessary to understand how Node.js is structured.
When a Node.js process is launched, it runs:
- One process
- One thread
- One event loop
- One JS Engine Instance
- One Node.js Instance
One process: a process is a global object that can be accessed anywhere and has information about what’s being executed at a time.
One thread: being single-threaded means that only one set of instructions is executed at a time in a given process.
One event loop: this is one of the most important aspects to understand about Node. It’s what allows Node to be asynchronous and have non-blocking I/O, — despite the fact that JavaScript is single-threaded — by offloading operations to the system kernel whenever possible through callbacks, promises and async/await.
One JS Engine Instance: this is a computer program that executes JavaScript code.
One Node.js Instance: the computer program that executes Node.js code.
In other words, Node runs on a single thread, and there is just one process happening at a time in the event loop. One code, one execution, (the code is not executed in parallel). This is very useful because it simplifies how you use JavaScript without worrying about concurrency issues.
The reason it was built with that approach is that JavaScript was initially created for client-side interactions (like web page interactions, or form validation) -- nothing that required the complexity of multithreading.
But, as with all things, there is a downside: if you have CPU-intensive code, like complex calculations in a large dataset taking place in-memory, it can block other processes from being executed. Similarly, If you are making a request to a server that has CPU-intensive code, that code can block the event loop and prevent other requests of being handled.
A function is considered “blocking” if the main event loop must wait until it has finished executing the next command. A “Non-blocking” function will allow the main event loop to continue as soon as it begins and typically alerts the main loop once it has finished by calling a “callback”.
The golden rule: don’t block the event loop, try to keep it running it and pay attention and avoid anything that could block the thread like synchronous network calls or infinite loops.
It’s important to differentiate between CPU operations and I/O (input/output) operations. As mentioned earlier, the code of Node.js is NOT executed in parallel. Only I/O operations are run in parallel, because they are executed asynchronously.
So Worker Threads will not help much with I/O-intensive work because asynchronous I/O operations are more efficient than Workers can be. The main goal of Workers is to improve the performance on CPU-intensive operations not I/O operations.
Some solutions
Furthermore, there are already solutions for CPU intensive operations: multiple processes (like cluster API) that make sure that the CPU is optimally used.
This approach is advantageous because it allows isolation of processes, so if something goes wrong in one process, it doesn’t affect the others. They also have stability and identical APIs. However, this means sacrificing shared memory, and the communication of data must be via JSON.
JavaScript and Node.js will never have threads, this is why:
So, people might think that adding a new module in Node.js core will allow us to create and sync threads, thus solving the problem of CPU-intensive operations.
Well, no, not really. If threads are added, the nature of the language itself will change. It’s not possible to add threads as a new set of available classes or functions. In languages that support multithreading (like Java), keywords such as “synchronized” help to enable multiple threads to sync.
Also, some numeric types are not atomic, meaning that if you don’t synchronize them, you could end up having two threads changing the value of a variable and resulting that after both threads have accessed it, the variable has a few bytes changed by one thread and a few bytes changed by the other thread and thus, not resulting in any valid value. For example, in the simple operation of 0.1 + 0.2 has 17 decimals in JavaScript (the maximum number of decimals).
var x = 0.1 + 0.2; // x will be 0.30000000000000004
But floating point arithmetic is not always 100% accurate. So if not synchronized, one decimal may get changed using Workers, resulting in non-identical numbers.
The best solution:
The best solution for CPU performance is Worker Threads. Browsers have had the concept of Workers for a long time.
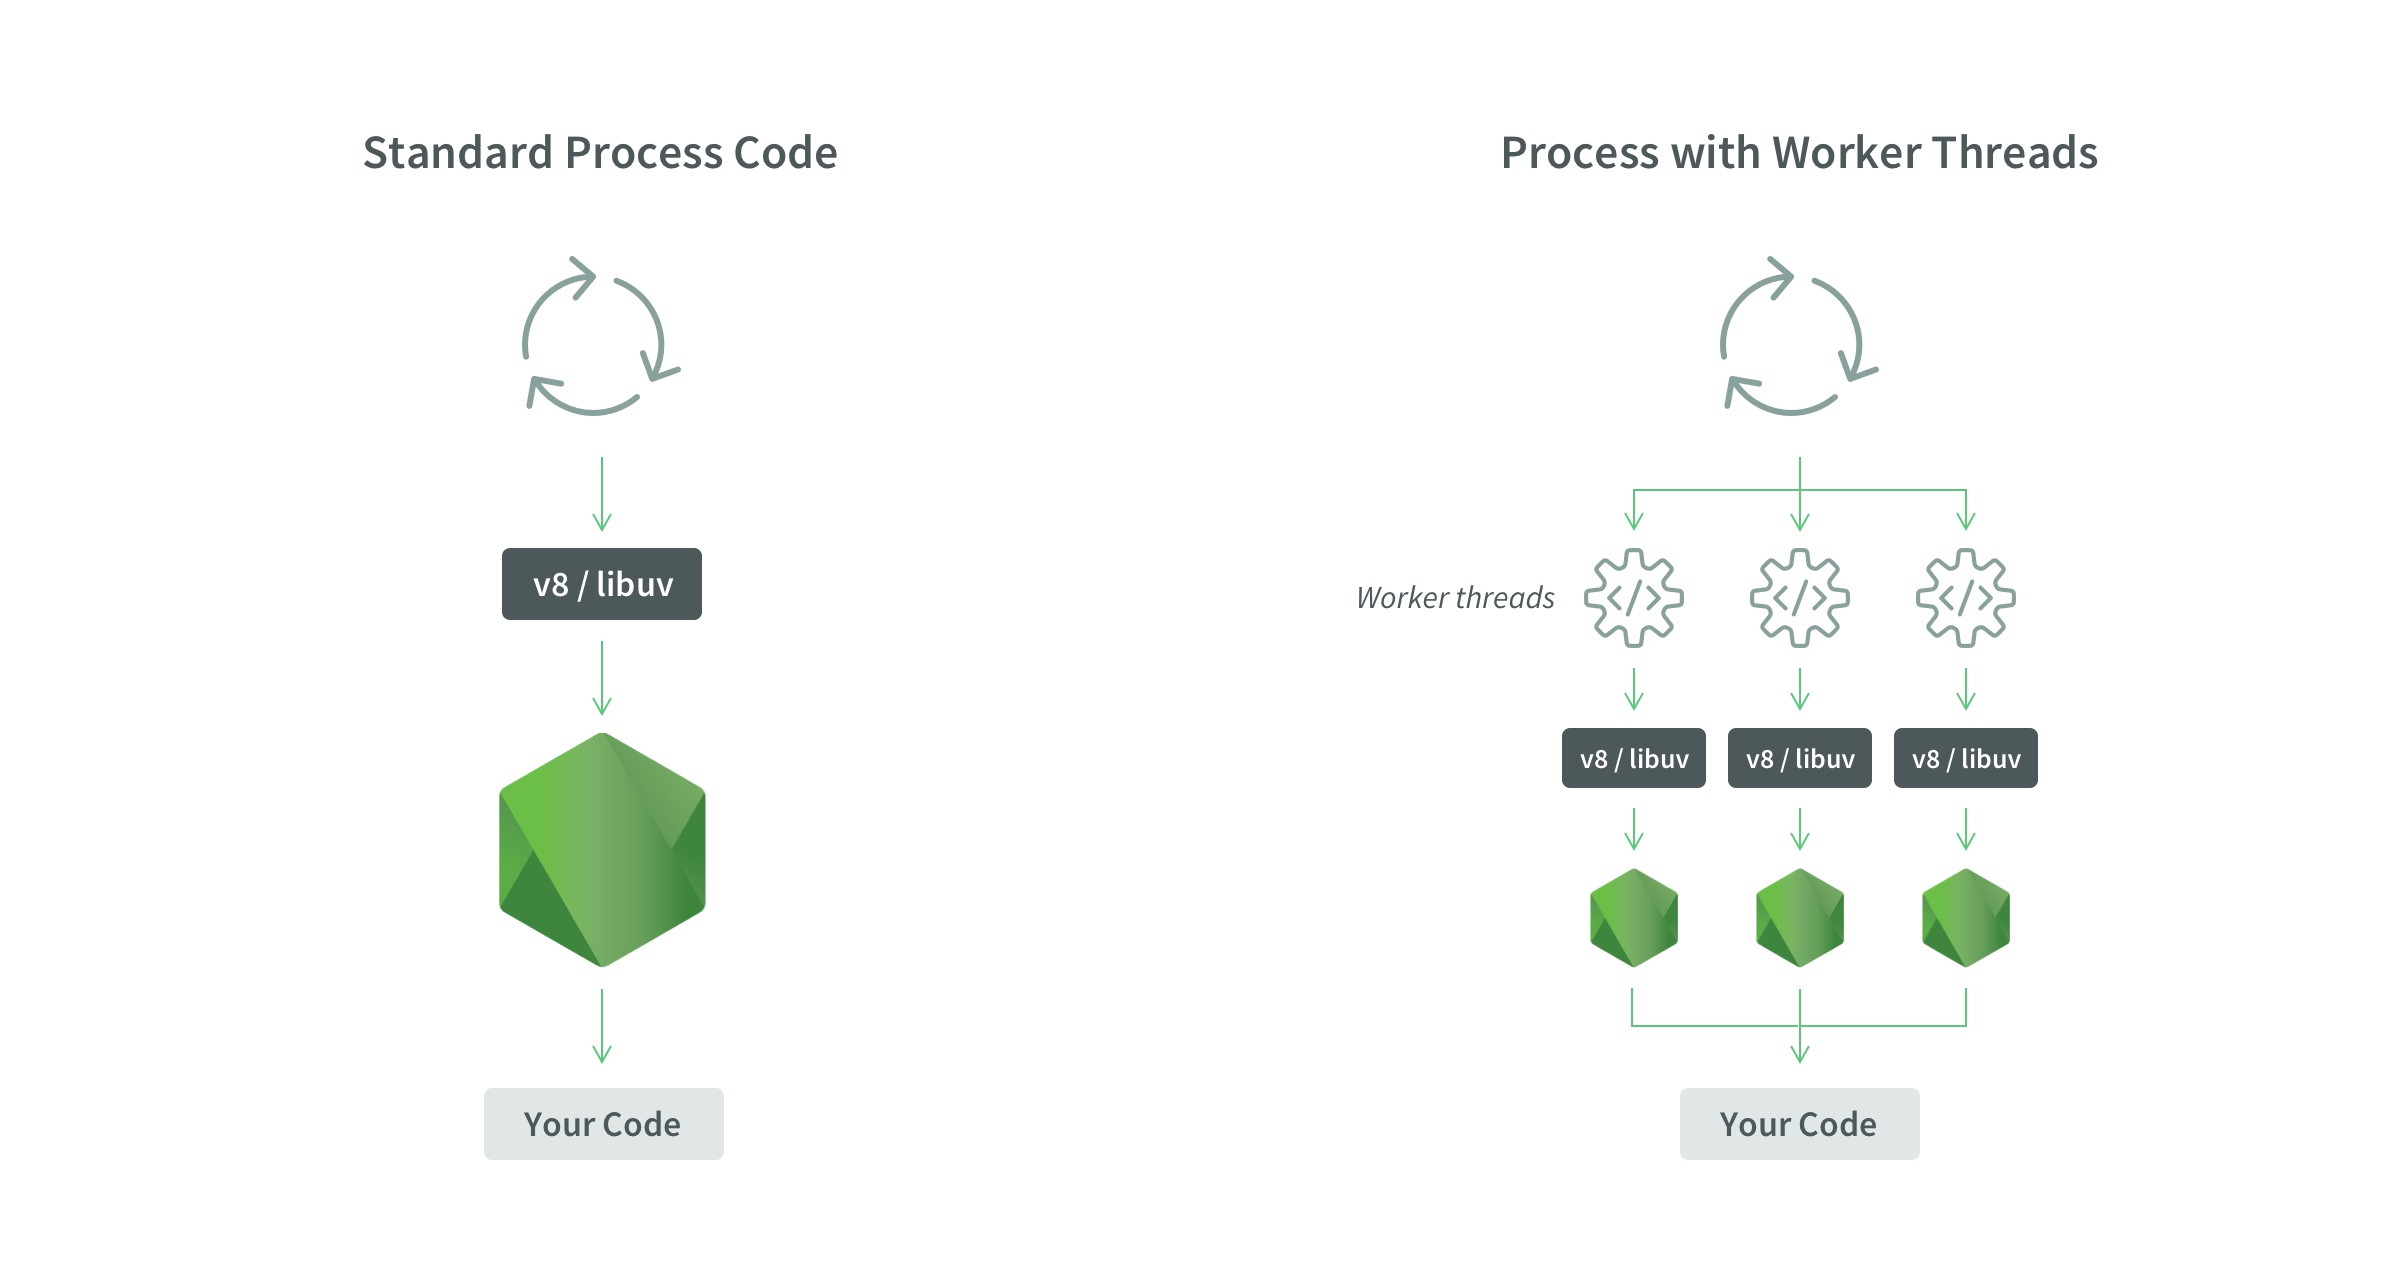
Instead of having:
- One process
- One thread
- One event loop
- One JS Engine Instance
- One Node.js Instance
Worker threads have:
- One process
- Multiple threads
- One event loop per thread
- One JS Engine Instance per thread
- One Node.js Instance per thread
As we can see in the following image:
The worker_threads module enables the use of threads that execute JavaScript in parallel. To access it:
const worker = require('worker_threads');
Worker Threads have been available since Node.js 10, but are still in the experimental phase.
What is ideal, is to have multiple Node.js instances inside the same process. With Worker threads, a thread can end at some point and it’s not necessarily the end of the parent process. It’s not a good practice for resources that were allocated by a Worker to hang around when the Worker is gone-- that’s a memory leak, and we don’t want that. We want to embed Node.js into itself, give Node.js the ability to create a new thread and then create a new Node.js instance inside that thread; essentially running independent threads inside the same process.
What makes Worker Threads special:
ArrayBuffersto transfer memory from one thread to anotherSharedArrayBufferthat will be accessible from either thread. It lets you share memory between threads (limited to binary data).Atomicsavailable, it lets you do some processes concurrently, more efficiently and allows you to implement conditions variables in JavaScriptMessagePort, used for communicating between different threads. It can be used to transfer structured data, memory regions and other MessagePorts between different Workers.MessageChannelrepresents an asynchronous, two-way communications channel used for communicating between different threads.WorkerDatais used to pass startup data. An arbitrary JavaScript value that contains a clone of the data passed to this thread’s Worker constructor. The data is cloned as if usingpostMessage()
API
const { worker, parentPort } = require(‘worker_threads’)=> Theworkerclass represents an independent JavaScript execution thread and theparentPortis an instance of the message portnew Worker(filename)ornew Worker(code, { eval: true })=> are the two main ways of starting a worker (passing the filename or the code that you want to execute). It’s advisable to use the filename in production.worker.on(‘message’),worker/postMessage(data)=> for listening to messages and sending them between the different threads.parentPort.on(‘message’),parentPort.postMessage(data)=> Messages sent usingparentPort.postMessage()will be available in the parent thread usingworker.on('message'), and messages sent from the parent thread usingworker.postMessage()will be available in this thread usingparentPort.on('message').
EXAMPLE:
const { Worker } = require('worker_threads');

const worker = new Worker(`
const { parentPort } = require('worker_threads');
parentPort.once('message',
    message => parentPort.postMessage({ pong: message }));
`, { eval: true });
worker.on('message', message => console.log(message));
worker.postMessage('ping');
$ node --experimental-worker test.js
{ pong: ‘ping’ }
What this essentially does is create a new thread using a new Worker, the code inside the Worker is listening for a message on parentPort and once it receives the message, it is going to post the message back to the main thread.
You have to use the --experimental-worker because Workers are still experimental.
Another example:
    const {
      Worker, isMainThread, parentPort, workerData
    } = require('worker_threads');

    if (isMainThread) {
      module.exports = function parseJSAsync(script) {
        return new Promise((resolve, reject) => {
          const worker = new Worker(filename, {
            workerData: script
          });
          worker.on('message', resolve);
          worker.on('error', reject);
          worker.on('exit', (code) => {
            if (code !== 0)
              reject(new Error(`Worker stopped with exit code ${code}`));
          });
        });
      };
    } else {
      const { parse } = require('some-js-parsing-library');
      const script = workerData;
      parentPort.postMessage(parse(script));
    }
It requires:
Worker: the class that represents an independent JavaScript execution thread.isMainThread: a boolean that is true if the code is not running inside of a Worker thread.parentPort: the MessagePort allowing communication with the parent thread If this thread was spawned as a Worker.workerData: An arbitrary JavaScript value that contains a clone of the data passed to this thread’s Worker constructor.
In actual practice for these kinds of tasks, use a pool of Workers instead. Otherwise, the overhead of creating Workers would likely exceed their benefit.
What is expected for Workers (hopefully):
- Passing native handles around (e.g. sockets, http request)
- Deadlock detection. Deadlock is a situation where a set of processes are blocked because each process is holding a resource and waiting for another resource acquired by some other process. Deadlock detention will be useful for Worker threads in this case.
- More isolation, so if one process is affected, it won’t affect others.
What NOT to expect for Workers:
- Don’t think Workers make everything magically faster, in some cases is better to use Worker pool
- Don’t use Workers for parallelizing I/O operations.
- Don’t think spawning Workers is cheap
Final notes:
The contributors to Workers in Node.js are looking for feedback, if you have used Workers before and want to contribute, you can leave your feedback here
Workers have chrome DevTools support to inspect Workers in Node.js.
And worker_threads is a promising experimental module if you need to do CPU-intensive tasks in your Node.js application. Keep in mind that it’s still experimental, so it is advisable to wait before using it in production. For now, you can use Worker pools instead.
References:
Special thanks to Anna Henningsen and her amazing talk of Node.js: The Road to Workers
Node.js multithreading: What are Worker Threads and why do they matter? - by Alberto Gimeno
Introduction to Javascript Processes - by Nico Valencia
Read More
Microservices are an architectural approach based on building an application as a collection of small services.
Let’s think of an application as a store. Applications are traditionally “monolithic” which means they are built as a single, autonomous unit --think of your favorite big-box store, selling everything from bananas to lawn furniture.

Everything is contained inside the unit. Let’s imagine that the person in this image - I’ll call him Jeff - is going inside the store to buy chewing gum and t-shirts. He can get a shopping cart to carry his purchases, look at products in different aisles, and pay at the checkstand before leaving--essentially, everything he needs is inside the store. These could also just as easily be components of an online Lego store application 👇.

All of this is run within a single process, and if our Lego store becomes very popular and we want to expand the business, we will have to add more Lego blocks in the same unit... and in the case of the online store, add more servers in order to scale it out.
So, every change (even minor changes) in our Lego store (physical or online) can be slow or tedious as it affects the entire system. In the case of Jeff’s store, a modification can require the removal or addition of multiple Lego blocks, affecting the entire structure. In the monolithic online store, a modification made to a small section of code might require building and deploying an entirely new version of software. So, scaling specific functions or components of the application, also means you have to scale the entire system.
Other problems with a monolithic approach in an online application are:
- Inflexibility: it cannot be built using different technologies
- Potentially unreliable: if even one feature of the system does not work, then the entire system does not work
- Unscalable: applications cannot be scaled easily, since each time the application needs to be updated, the complete system has to be rebuilt
- Not suitable for continuous development: many features of an application cannot be built and deployed at the same time
- Slow development: As you can likely guess from the preceding points, development in monolithic applications takes a lot of time, since each feature has to be built individually, one after the other, rather than allowing multiple features to be worked on concurrently
This is where microservices come to the rescue!

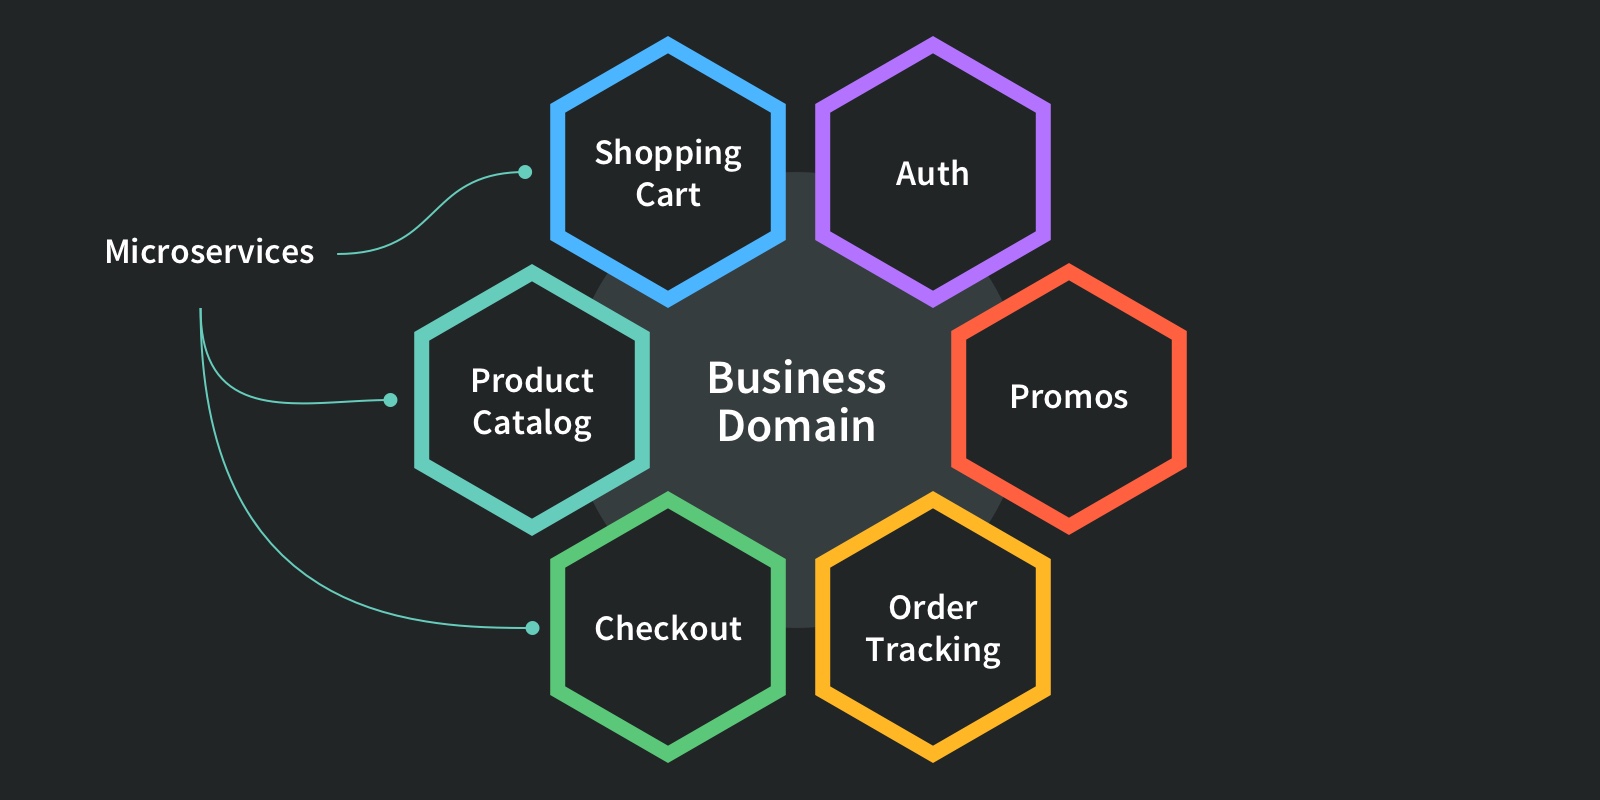
Instead of containing everything in a single unit, the microservices-based application is broken down into smaller, lightweight pieces based on a logical construct. The application consists of independent small (micro-) services, and when we deploy or scale the app, individual services get distributed within a set of machines which we call “a cluster” in the service fabric world.
So in our Lego store example, perhaps one microservice contains a shopping cart, another one a product catalog, while another handles checkout, and so on. This approach allows developers to embrace compact and specialized tools that get each job done properly. Microservices are exactly that, scaled to enterprise level.
Each service has its own unique and well-defined role, runs in its own process, and communicates via HTTP APIs or messaging. Each microservice can be deployed, upgraded, scaled, and restarted independently of all the sibling services in the application. They are typically managed by an automated system, making it possible to deploy frequent updates to live applications without affecting the end-users.
Following this pattern, Jeff’s store will be very different: now he won’t have one big store where he can find everything he needs, but there would have multiple stores and each store will be independent and have specific functions. The first store may contain only Lego castles, another one bridges, and another one, Lego rockets 🚀.

All of the Lego stores will be part of a “Lego shopping mall” or “cluster,” and if I want to expand, scale, upgrade, or modify only the store selling rockets, the castle store (and the rest) won’t be affected.
In other words, developers identify the separate service “pieces” that are logically closely related and necessary parts of a project. Then, they choose from the options available that meet their particular needs, from open source to enterprise solutions, and knit everything together into a functional application.
Advantages of using microservices:
- Allows us to build, operate and manage services independently, and we can easily scale them out based on the resources they need.
- Microservices take a lot of infrastructure risk out of the project straight away. With the infrastructure made almost invisible, microservice teams can iterate quickly.
- Each developer on a team can avoid getting tangled up in the underlying infrastructure, and focus on their piece of the project. Then, in production, if individual project modules don’t work exactly right together, it’s easy enough to isolate, disassemble and reconfigure them until they do. If shoppers aren’t big fans of the mall’s specialty ketchup store, a shoe store can be built in its place. It offers better resource utilization and cost optimization
- Microservices have their own load balancer and execution environment to execute their functionalities, and at the same time, capture data in their own databases.
- Finally, microservices offer language and platform freedom, so teams can choose the best language for the job at hand (even if that’s .NET for one team and Node.js for another team).
Drawbacks of microservices:
- Microservices are not automatically the right solution for every project. When you are running multiple instances of the same service or worker, you don’t necessarily need microservices. A well-built monolithic system can scale just as well for some classes of problems.
- One of the big problems with microservices is “orchestration”, which means how to integrate the services with a guide to drive the process, much like a conductor in an orchestra. Integrating microservices can be quite complex.
- Another complex process is “discovery” which is how applications and (micro)services locate each other on a network.
- Moving away from a monolithic app architecture means the loss of an opinionated workflow that previously glued all the pieces together.
- There is a risk in getting a very fragmented system where developers need to spend a lot of time and effort on gluing together services and tools, and where there’s a lack of common patterns and platforms that makes it difficult to work across different projects.
- Microservices can also require increased testing complexity and possibly increased memory/computing resources.
- It’s possible to create un-scalable microservices. It all comes down to how well you apply the fundamental principles. It’s all too easy to jump into shopping for all the microservices you want to apply without first truly considering the problem set you’re applying them to
Creating Microservices with Node.js
In this example, we’re going to create a microservice using Node.js which connects to an external API.
The requirement for this service is to accept two Zip Codes of two Lego stores and return the distance between them in miles.
Initial Steps
- Have Node.js installed
- Run
npm initin the root folder for the project. This will create a package.json file that will prompt some questions about the package, if you are not sure how to answer you can use the default. - We are going to use two packages, Express and Require that can be installed like this:
$ npm install express request --save
Let’s look at the structure of the folders. There are two files and a folder created by the npm init command. These are package.json, package-lock.json, and node_modules. When we installed the express and request packages, their dependencies were downloaded and saved in node_modules.
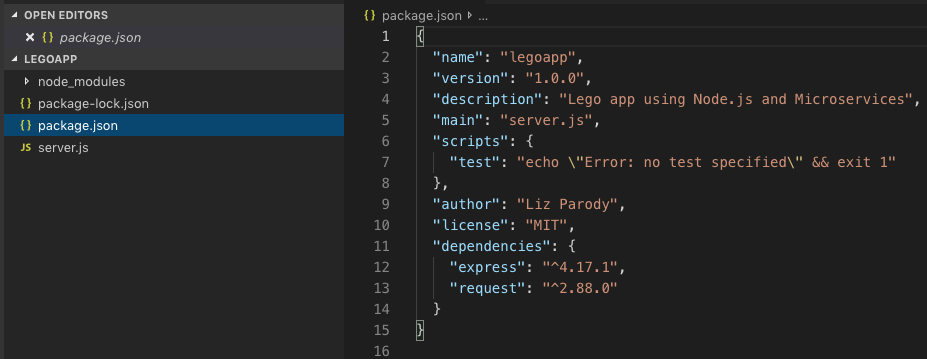
The primary file in our project is named server.js. And your package.json should look similar to this ☝️.
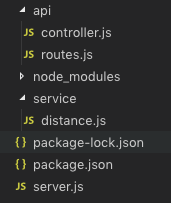
Then we create two folders, api for files that will support the API, and service for the logic to connect to a third-party API.
Let’s build our service!
Creating a Server to Accept Requests
Create a file in the root folder for your project called server.js which will be our primary file. This file contains the code below.
const express = require('express')
const app = express();
const port = process.env.PORT || 3000;

const routes = require('./api/routes');
routes(app);
app.listen(port, function() {
   console.log('Server started on port: ' + port);
});
This file is creating our server and assigns routes to process all requests.
We first require express into the file, and use it to create a new app object const app = express(); then we specify the port, in this case, we use the environment variable called PORT, and if the variable isn’t defined, it will use the default port: 3000.
Then we bring the routes object from the routes.js file in the api folder. We’ll pass the app to the routes object, and that sets the routes for our application. Finally, we’ll tell the app to start listening on the port we defined and to display a message to the console when this process is complete.
Defining the routes
The next step is to define the routes for the microservices and then assign each to a target in the controller object (that will control the flow of data in the application). We’ll build the controller in the next step. We’ll have two endpoints. One endpoint called “about” that returns information about the application. And a “distance” endpoint that includes two path parameters, both Zip Codes of the Lego store. This endpoint returns the distance, in miles, between these two Zip Codes.
'use strict';

const controller = require('./controller');

module.exports = function(app) {
   app.route('/about')
       .get(controller.about);
   app.route('/distance/:zipcode1/:zipcode2')
       .get(controller.getDistance);
};
The ‘use strict’ directive at the top of the file is used by new versions of Javascript to enforce secure coding practices. The first thing we’ll do is to create a controller object which we’ll define in the next step.
Module.exports allows us to declare functions inside a module, and have them available for use in another file. This file constitutes the routes module, which we imported into our primary server.js file and used it to define the routes for our express app.
This function adds two routes to the app. The first route listens for GET requests on the /about endpoint. These requests are handled by the about function in the controller. The second route listens for GET requests on the /distance endpoint. The getDistance function in the controller handles these requests. Two parameters are also specified. These are labeled zipcode1 and zipcode2 respectively.
Let’s build the controller to handle those requests.
Adding Controller Logic
Within the controller file, we’re going to create a controller object with two properties. Those properties are the functions to handle the requests we defined in the routes module.
'use strict';

var properties = require('../package.json')
var distance = require('../service/distance');

var controllers = {
   about: function(req, res) {
       var aboutInfo = {
           name: properties.name,
           version: properties.version
       }
       res.json(aboutInfo);
   },
   getDistance: function(req, res) {
           distance.find(req, res, function(err, dist) {
               if (err)
                   res.send(err);
               res.json(dist);
           });
       },
};

module.exports = controllers;
We have two distinct parts to our controller. We’ll go through the code for the about functionality first. At the top, we create an object called properties which references the package.json file which npm created when it bootstrapped the project. This file is in JavaScript Object Notation or JSON for short. This format affords us the ability to import and use the information it contains.
Within the controllers object, we define a property called about. This property is a function which accepts request and response objects. We’ll only use the response object for this function. Using the name and version information from the package.json file, we’ll build a new object and return it as the response.
For the getDistance functionality, we’ll start by bringing in the distance module. We’ll pass the request and response objects to the find function within this module. This function also includes a callback function. This function accepts an error object (err) and a distance object (dist). If there is an error in the response, we return that with our response; otherwise, we send back the results of the find function.
Making the External Call
We’re ready for the final piece of the puzzle. This file handles the call to a third-party API. We’ll use the distance API provided by ZipCodeAPI.com. (You need an API key to use this, and it is free if you register. You can also use the key from the example if you want to test your service, but this key frequently expires during the day).
I set my key as an environment variable on my system and named it ZIPCODEAPIKEY. The default key in the code is an expired test key from the ZipCodeAPI website.
var request = require('request');

const apiKey = process.env.ZIPCODE_API_KEY || "hkCt1nW1wF1rppaEmoor7T9G4ta7R5wFSu8l1dokNz8y53gGZHDneWWVosbEYirC";
const zipCodeURL = 'https://www.zipcodeapi.com/rest/';

var distance = {
   find: function(req, res, next) {
       request(zipCodeURL + apiKey
               + '/distance.json/' + req.params.zipcode1 + '/'
               + req.params.zipcode2 + '/mile',
       function (error, response, body) {
           if (!error && response.statusCode == 200) {
               response = JSON.parse(body);
               res.send(response);
           } else {
               console.log(response.statusCode + response.body);
               res.send({distance: -1});
           }
       });

   }
};

module.exports = distance;
We’re using the request package to execute the external HTTP request, and we already discussed the api Key above. Ensure that you update it unless you want to start by testing the error conditions.
The find function accepts request, response and next objects as parameters. The request object accepts the URL of the service we’re calling and then defines a callback function to handle the response.
If there are no errors, and the status of the response is HTTP Status code 200, then the function parses out the body of the response into an object called response and returns it on the resp object. Since the ZipCodeAPI returns with a JSON response, we could forward this directly. Parsing it out allows us the option of doing more with the response if we choose to.
We log failures to the console, and then a result of -1 is sent on the response object. You may opt to create an error object to return as well.
Finally, we export the distance object, which allows the controller to instantiate it and call its functions as needed.
Execution
Assuming there aren’t any typos, your application should be ready to execute. Open a console window and run the following command:
npm start
Assuming it starts correctly, and the port you define is 3000, you can now open your browser and navigate to:
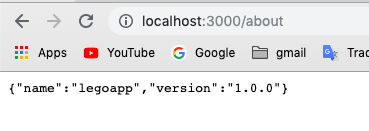
http://localhost:3000/about when you will see the name of the app and the version.
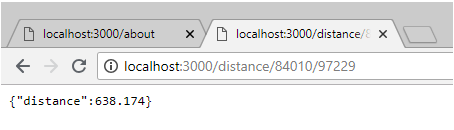
Now if you add two parameters, the two zip codes, you will see something like this:
http://localhost:3000/distance/84010/97229
And that’s it! Using microservices to know the distance between two zip codes!
Conclusion
In microservices, every single service is independently deployable, scalable and updatable, this is what makes microservices such an appealing architectural approach to the industry.
A microservice is loosely coupled and interacts with other microservices for well-defined interfaces using protocols like http, they remain consistent and available in the presence of failure, meaning even if the machine goes down that host a microservice, the functionality provided by the service should still be offered by the application.
While microservices are great, there is quite some work involved to build a scalable microservice application on a platform as you need to consider things like cluster management, service orchestration, inter-service communication and so on, and you also need to put a lot of effort into following DevOpsbest practices.
Not to mention that microservices can also require increased testing complexity and possibly increased memory/computing resources. Thus, despite the abundant potential benefits, those knowledgeable in the field caution that microservices are not automatically the right solution for every project.
- Lego is a registered trademark
Resources
- Introduction to Microservices
- What is Microservices?
- Microservices 101
- What Is Microservices? An Introduction to Microservice Architecture
- https://blog.cloud66.com/beginners-guide-to-building-real-world-microservices-with-node-js/
- Beginners Guide to Building Real-World Microservices with Node.js

Streams in Node.js have a reputation for being hard to work with, and even harder to understand.
In the words of Dominic Tarr: “Streams are Node’s best and most misunderstood idea.” Even Dan Abramov, creator of Redux and core team member of React.js is afraid of Node streams.
This article will help you understand streams and how to work with them. So, don’t be afraid. We can figure this out!
What are streams?
Streams are one of the fundamental concepts that power Node.js applications. They are data-handling method and are used to read or write input into output sequentially.
Streams are a way to handle reading/writing files, network communications, or any kind of end-to-end information exchange in an efficient way.
What makes streams unique, is that instead of a program reading a file into memory all at once like in the traditional way, streams read chunks of data piece by piece, processing its content without keeping it all in memory.
This makes streams really powerful when working with large amounts of data, for example, a file size can be larger than your free memory space, making it impossible to read the whole file into the memory in order to process it. That’s where streams come to the rescue!
Using streams to process smaller chunks of data, makes it possible to read larger files.
Let’s take a “streaming” services such as YouTube or Netflix for example: these services don’t make you download the video and audio feed all at once. Instead, your browser receives the video as a continuous flow of chunks, allowing the recipients to start watching and/or listening almost immediately.
However, streams are not only about working with media or big data. They also give us the power of ‘composability’ in our code. Designing with composability in mind means several components can be combined in a certain way to produce the same type of result. In Node.js it’s possible to compose powerful pieces of code by piping data to and from other smaller pieces of code, using streams.
Why streams
Streams basically provide two major advantages compared to other data handling methods:
- Memory efficiency: you don’t need to load large amounts of data in memory before you are able to process it
- Time efficiency: it takes significantly less time to start processing data as soon as you have it, rather than having to wait with processing until the entire payload has been transmitted
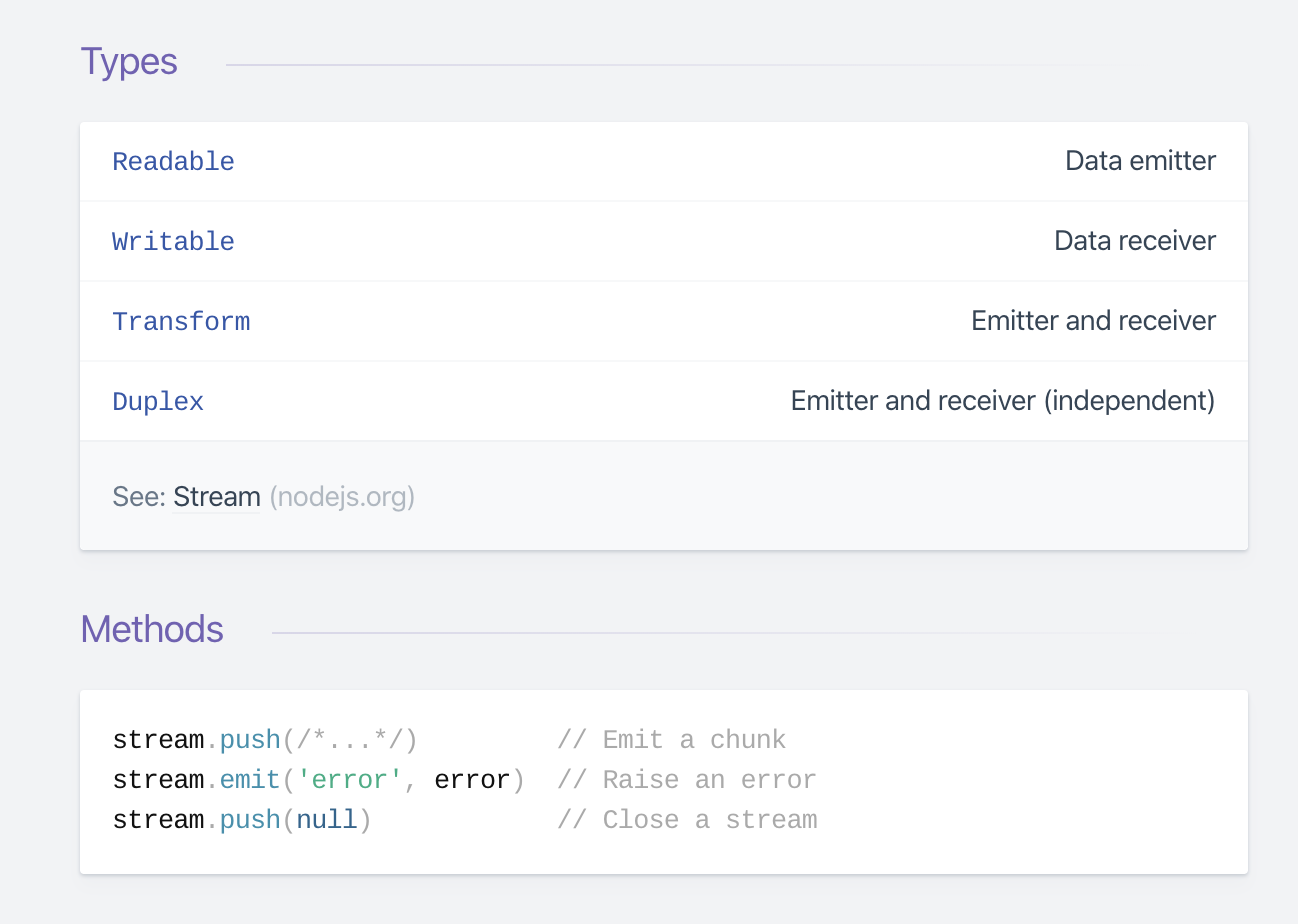
There are 4 types of streams in Node.js:
- Writable: streams to which we can write data. For example,
fs.createWriteStream()lets us write data to a file using streams. - Readable: streams from which data can be read. For example:
fs.createReadStream()lets us read the contents of a file. - Duplex: streams that are both Readable and Writable. For example,
net.Socket - Transform: streams that can modify or transform the data as it is written and read. For example, in the instance of file-compression, you can write compressed data and read decompressed data to and from a file.
If you have already worked with Node.js, you may have come across streams. For example, in a Node.js based HTTP server, request is a readable stream and response is a writable stream. You might have used the fs module, which lets you work with both readable and writable file streams. Whenever you’re using Express you are using streams to interact with the client, also, streams are being used in every database connection driver that you can work with, because of TCP sockets, TLS stack and other connections are all based on Node.js streams.
A practical example
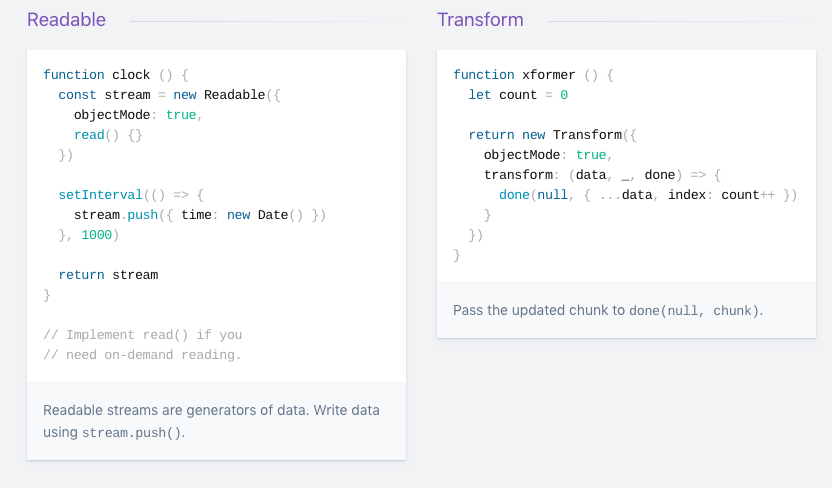
How to create a readable stream
We first require the Readable stream, and we initialize it.
const Stream = require('stream')
const readableStream = new Stream.Readable()
Now that the stream is initialized, we can send data to it:
readableStream.push('ping!')
readableStream.push('pong!')
async iterator
It’s highly recommended to use async iterator when working with streams. According to Dr. Axel Rauschmayer, Asynchronous iteration is a protocol for retrieving the contents of a data container asynchronously (meaning the current “task” may be paused before retrieving an item). Also, it’s important to mention that the stream async iterator implementation use the ‘readable’ event inside.
You can use async iterator when reading from readable streams:
import * as fs from 'fs';

async function logChunks(readable) {
  for await (const chunk of readable) {
    console.log(chunk);
  }
}

const readable = fs.createReadStream(
  'tmp/test.txt', {encoding: 'utf8'});
logChunks(readable);

// Output:
// 'This is a test!\n'
It’s also possible to collect the contents of a readable stream in a string:
import {Readable} from 'stream';

async function readableToString2(readable) {
  let result = '';
  for await (const chunk of readable) {
    result += chunk;
  }
  return result;
}

const readable = Readable.from('Good morning!', {encoding: 'utf8'});
assert.equal(await readableToString2(readable), 'Good morning!');
Note that, in this case, we had to use an async function because we wanted to return a Promise.
It’s important to keep in mind to not mix async functions with EventEmitter because currently, there is no way to catch a rejection when it is emitted within an event handler, causing hard to track bugs and memory leaks. The best current practice is to always wrap the content of an async function in a try/catch block and handle errors, but this is error prone. This pull request aims to solve this issue once it lands on Node core.
To learn more about Node.js streams via async iteration, check out this great article.
Readable.from(): Creating readable streams from iterables
stream.Readable.from(iterable, [options]) it’s a utility method for creating Readable Streams out of iterators, which holds the data contained in iterable. Iterable can be a synchronous iterable or an asynchronous iterable. The parameter options is optional and can, among other things, be used to specify a text encoding.
const { Readable } = require('stream');

async function * generate() {
  yield 'hello';
  yield 'streams';
}

const readable = Readable.from(generate());

readable.on('data', (chunk) => {
  console.log(chunk);
});
Two Reading Modes
According to Streams API, readable streams effectively operate in one of two modes: flowing and paused. A Readable stream can be in object mode or not, regardless of whether it is in flowing mode or paused mode.
- In flowing mode, data is read from the underlying system automatically and provided to an application as quickly as possible using events via the EventEmitter interface.
- In paused mode, the
stream.read()method must be called explicitly to read chunks of data from the stream.
In a flowing mode, to read data from a stream, it’s possible to listen to data event and attach a callback. When a chunk of data is available, the readable stream emits a data event and your callback executes. Take a look at the following snippet:
var fs = require("fs");
var data = '';

var readerStream = fs.createReadStream('file.txt'); //Create a readable stream

readerStream.setEncoding('UTF8'); // Set the encoding to be utf8.

// Handle stream events --> data, end, and error
readerStream.on('data', function(chunk) {
   data += chunk;
});

readerStream.on('end',function() {
   console.log(data);
});

readerStream.on('error', function(err) {
   console.log(err.stack);
});

console.log("Program Ended");
The function call fs.createReadStream() gives you a readable stream. Initially, the stream is in a static state. As soon as you listen to data event and attach a callback it starts flowing. After that, chunks of data are read and passed to your callback. The stream implementor decides how often a data event is emitted. For example, an HTTP request may emit a data event once every few KBs of data are read. When you are reading data from a file you may decide you emit a data event once a line is read.
When there is no more data to read (end is reached), the stream emits an end event. In the above snippet, we listen to this event to get notified when the end is reached.
Also, if there is an error, the stream will emit and notify the error.
In paused mode, you just need to call read() on the stream instance repeatedly until every chunk of data has been read, like in the following example:
var fs = require('fs');
var readableStream = fs.createReadStream('file.txt');
var data = '';
var chunk;

readableStream.on('readable', function() {
    while ((chunk=readableStream.read()) != null) {
        data += chunk;
    }
});

readableStream.on('end', function() {
    console.log(data)
});
The read() function reads some data from the internal buffer and returns it. When there is nothing to read, it returns null. So, in the while loop, we check for null and terminate the loop. Note that the readable event is emitted when a chunk of data can be read from the stream.
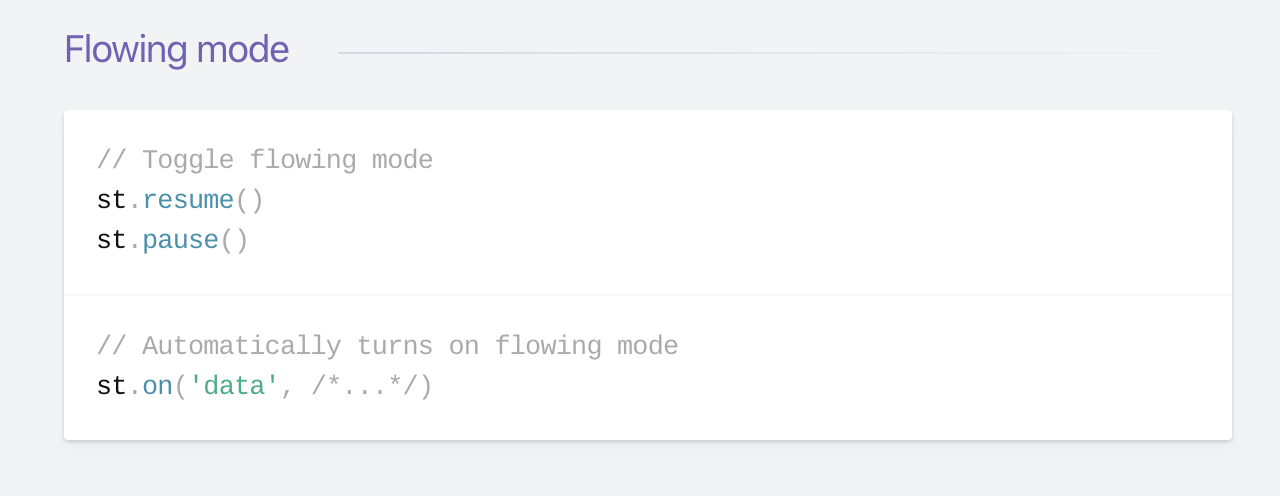
All Readable streams begin in paused mode but can be switched to flowing mode in one of the following ways:
- Adding a 'data' event handler.
- Calling the
stream.resume()method. - Calling the
stream.pipe()method to send the data to a Writable.
The Readable can switch back to paused mode using one of the following:
- If there are no pipe destinations, by calling the
stream.pause()method. - If there are pipe destinations, by removing all pipe destinations. Multiple pipe destinations may be removed by calling the
stream.unpipe()method.
The important concept to remember is that a Readable will not generate data until a mechanism for either consuming or ignoring that data is provided. If the consuming mechanism is disabled or taken away, the Readable will attempt to stop generating the data.
Adding a readable event handler automatically make the stream to stop flowing, and the data to be consumed via readable.read(). If the 'readable' event handler is removed, then the stream will start flowing again if there is a 'data' event handler.
How to create a writable stream
To write data to a writable stream you need to call write() on the stream instance. Like in the following example:
var fs = require('fs');
var readableStream = fs.createReadStream('file1.txt');
var writableStream = fs.createWriteStream('file2.txt');

readableStream.setEncoding('utf8');

readableStream.on('data', function(chunk) {
    writableStream.write(chunk);
});
The above code is straightforward. It simply reads chunks of data from an input stream and writes to the destination using write(). This function returns a boolean value indicating if the operation was successful. If true, then the write was successful and you can keep writing more data. If false is returned, it means something went wrong and you can’t write anything at the moment. The writable stream will let you know when you can start writing more data by emitting a drain event.
Calling the writable.end() method signals that no more data will be written to the Writable. If provided, the optional callback function is attached as a listener for the 'finish' event.
// Write 'hello, ' and then end with 'world!'.
const fs = require('fs');
const file = fs.createWriteStream('example.txt');
file.write('hello, ');
file.end('world!');
// Writing more now is not allowed!
Using a writable stream you can read data from a readable stream:
const Stream = require('stream')

const readableStream = new Stream.Readable()
const writableStream = new Stream.Writable()

writableStream._write = (chunk, encoding, next) => {
    console.log(chunk.toString())
    next()
}

readableStream.pipe(writableStream)

readableStream.push('ping!')
readableStream.push('pong!')

writableStream.end()
You can also use async iterators to write to a writable stream, which is recommended
import * as util from 'util';
import * as stream from 'stream';
import * as fs from 'fs';
import {once} from 'events';

const finished = util.promisify(stream.finished); // (A)

async function writeIterableToFile(iterable, filePath) {
  const writable = fs.createWriteStream(filePath, {encoding: 'utf8'});
  for await (const chunk of iterable) {
    if (!writable.write(chunk)) { // (B)
      // Handle backpressure
      await once(writable, 'drain');
    }
  }
  writable.end(); // (C)
  // Wait until done. Throws if there are errors.
  await finished(writable);
}

await writeIterableToFile(
  ['One', ' line of text.\n'], 'tmp/log.txt');
assert.equal(
  fs.readFileSync('tmp/log.txt', {encoding: 'utf8'}),
  'One line of text.\n');
The default version of stream.finished() is callback-based but can be turned into a Promise-based version via util.promisify() (line A).
In this example, it is used the following two patterns:
Writing to a writable stream while handling backpressure (line B):
if (!writable.write(chunk)) {
  await once(writable, 'drain');
}
Closing a writable stream and waiting until writing is done (line C):
writable.end();
await finished(writable);
pipeline()
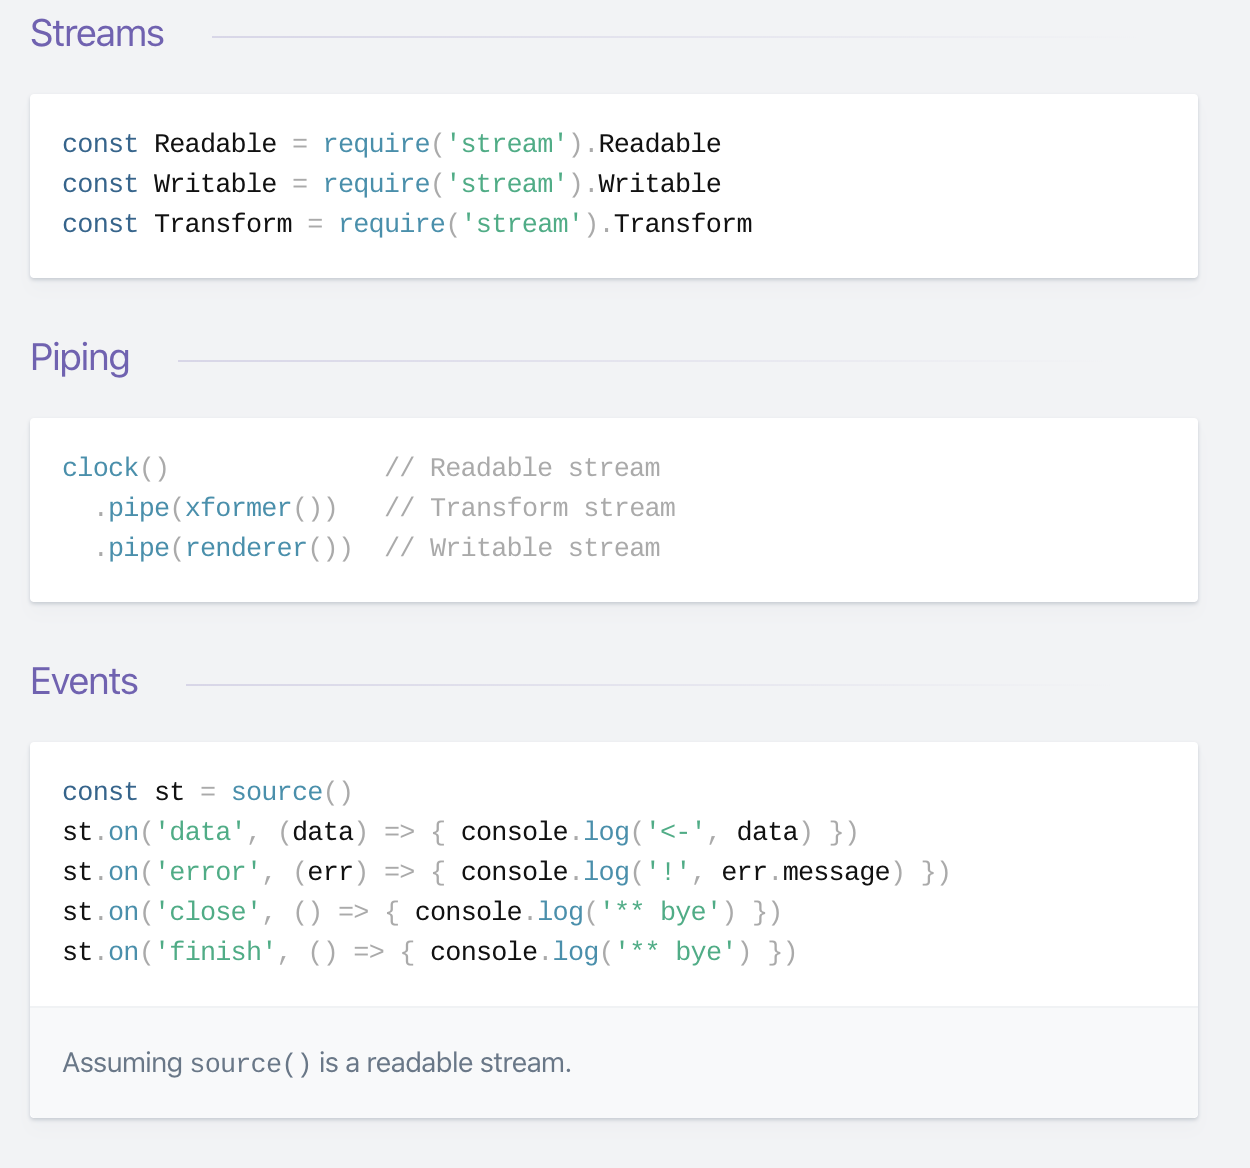
Piping is a mechanism where we provide the output of one stream as the input to another stream. It is normally used to get data from one stream and to pass the output of that stream to another stream. There is no limit on piping operations. In other words, piping is used to process streamed data in multiple steps.
In Node 10.x was introduced stream.pipeline(). This is a module method to pipe between streams forwarding errors and properly cleaning up and provide a callback when the pipeline is complete.
Here is an example of using pipeline:
const { pipeline } = require('stream');
const fs = require('fs');
const zlib = require('zlib');

// Use the pipeline API to easily pipe a series of streams
// together and get notified when the pipeline is fully done.
// A pipeline to gzip a potentially huge video file efficiently:

pipeline(
  fs.createReadStream('The.Matrix.1080p.mkv'),
  zlib.createGzip(),
  fs.createWriteStream('The.Matrix.1080p.mkv.gz'),
  (err) => {
    if (err) {
      console.error('Pipeline failed', err);
    } else {
      console.log('Pipeline succeeded');
    }
  }
);
pipeline should be used instead of pipe, as pipe is unsafe.
The Stream Module
The Node.js stream module provides the foundation upon which all streaming APIs are build.
The Stream module is a native module that shipped by default in Node.js. The Stream is an instance of the EventEmitter class which handles events asynchronously in Node. Because of this, streams are inherently event-based.
To access the stream module:
const stream = require('stream');
The stream module is useful for creating new types of stream instances. It is usually not necessary to use the stream module to consume streams.
Streams-powered Node APIs
Due to their advantages, many Node.js core modules provide native stream handling capabilities, most notably:
net.Socketis the main node api that is stream are based on, which underlies most of the following APIsprocess.stdinreturns a stream connected to stdinprocess.stdoutreturns a stream connected to stdoutprocess.stderrreturns a stream connected to stderrfs.createReadStream()creates a readable stream to a filefs.createWriteStream()creates a writable stream to a filenet.connect()initiates a stream-based connectionhttp.request()returns an instance of the http.ClientRequest class, which is a writable streamzlib.createGzip()compress data using gzip (a compression algorithm) into a streamzlib.createGunzip()decompress a gzip stream.zlib.createDeflate()compress data using deflate (a compression algorithm) into a streamzlib.createInflate()decompress a deflate stream
Streams Cheat Sheet:
Here are some important events related to writable streams:
error– Emitted to indicate that an error has occurred while writing/piping.pipeline– When a readable stream is piped into a writable stream, this event is emitted by the writable stream.unpipe– Emitted when you call unpipe on the readable stream and stop it from piping into the destination stream.
Conclusion
This was all about the basics of streams. Streams, pipes, and chaining are the core and most powerful features in Node.js. Streams can indeed help you write neat and performant code to perform I/O.
Also, there is a Node.js strategic initiative worth looking to, called BOB, aiming to improve Node.js streaming data interfaces, both within Node.js core internally, and hopefully also as future public APIs.
References
Special thanks to Matteo Colina and Jeremiah Senkpiel for your feedback!
- Stream API
- Node.js Streams: Everything you need to know
- Node.js Streams
- The Basics of Node.js Streams
- Node.js streams cheatsheet
- Node.js - Streams
- Easier Node.js streams via async iteration
- You’re probably using streams

Tracking down memory leaks in Node.js has been a recurring topic, people are always interested in learning more about due to the complexity and the range of causes.
Not all memory leaks are immediately obvious - quite the opposite; however once we identify a pattern, we must look for a correlation between memory usage, objects held in memory and response time. When examining objects, look into how many of them are collected, and whether any of them are usual, depending on the framework or technique used to serve the content (ex. Server Side Rendering). Hopefully, after you finish this article, you'll be able to understand, and look for a strategy to debug the memory consumption of a Node.js application.
Garbage Collection Theory in Node.js
JavaScript is a garbage collected language and Google’s V8 is a JavaScript engine, initially created for Google Chrome, that can be used as a standalone runtime in many instances. Two important operations of the Garbage Collector in Node.js are:
- identify live or dead objects and
- recycle/reuse the memory occupied by dead objects.
Something important to keep in mind: When the Garbage Collector runs, it pauses your application entirely until it finishes its work. As such you will need to minimize its work by taking care of your objects’ references.
All memory used by a Node.js process is being automatically allocated and de-allocated by the V8 JavaScript engine. Let’s see how this looks in practice.
If you think of memory as a graph, then imagine V8 keeping a graph of all variables in the program, starting from the ‘Root node’. This could be your window or the global object in a Node.js module, usually known as the dominator. Something important to keep in mind is you don’t control how this Root node is de-allocated.
Next, you’ll find an Object node, usually known as leaves (there are no child references). Finally, there are 4 types of data types in JavaScript: Boolean, String, Number, and Object.
V8 will walk through the graph and try to identify groups of data that can no longer be reached from the Root node. If it’s not reachable from the Root node, V8 assumes that the data is no longer used and releases the memory. Remember: to determine whether an object is live, it is necessary to check if is reachable through some chain of pointers from an object which is live by definition; everything else, such as an object being unreachable from a root node or not referenceable by a root node or another live object is considered garbage.
In a nutshell, the garbage collector has two main tasks;
- trace and
- count references between objects.
It can get tricky when you need to track remote references from another process, but in Node.js applications, we use a single process which makes our life a bit easier.
V8’s Memory Scheme
V8 uses a scheme similar to the Java Virtual Machine and divides the memory into segments. The thing that wraps the scheme concept is known as Resident Set, which refers to the portion of memory occupied by a process that is held in the RAM.
Inside the Resident Set you will find:
- Code Segment: Where the actual code is being executed.
- Stack: Contains local variables and all value types with pointers referencing objects on the heap or defining the control flow of the application.
- Heap: A memory segment dedicated to storing reference types like objects, strings and closures.
Two more important things to keep in mind:
- Shallow size of an object: the size of memory that is held by the object itself
- Retained size of an object: the size of the memory that is freed up once the object is deleted along with its' dependent objects
Node.js has an object describing the memory usage of the Node.js process measured in bytes. Inside the object you’ll find:
- rss: Refers to resident set size.
- heapTotal and heapUsed: Refers to V8's memory usage.
- external: refers to the memory usage of C++ objects bound to JavaScript objects managed by V8.
Finding the leak
Chrome DevTools is a great tool that can be used to diagnose memory leaks in Node.js applications via remote debugging. Other tools exist and they will give you the similar. This blog post relies on one of those different tools in order to give you a clear clear understanding of what is happening. However, you need to keep in mind that profiling is an intensive CPU task, which can impact your application negatively. Be aware!
The Node.js application we are going to profile is a simple HTTP API Server that has multiple endpoints, returning different information to whoever is consuming the service. You can clone the repository of the Node.js application used here.
const http = require('http')

const leak = []

function requestListener(req, res) {

  if (req.url === '/now') {
    let resp = JSON.stringify({ now: new Date() })
    leak.push(JSON.parse(resp))
    res.writeHead(200, { 'Content-Type': 'application/json' })
    res.write(resp)
    res.end()
  } else if (req.url === '/getSushi') {
    function importantMath() {
    let endTime = Date.now() + (5 * 1000);
    while (Date.now() < endTime) {
        Math.random();
    }
    }

    function theSushiTable() {
    return new Promise(resolve => {
        resolve('🍣');
    });
    }

    async function getSushi() {
    let sushi = await theSushiTable();
    res.writeHead(200, { 'Content-Type': 'text/html; charset=utf-8' })
    res.write(`Enjoy! ${sushi}`);
    res.end()
    }

    getSushi()
    importantMath()
  } else {
    res.end('Invalid request')
  }
}

const server = http.createServer(requestListener)
server.listen(process.env.PORT || 3000)
Start the Node.js application:
We have been using a 3S (3 Snapshot) approach to diagnostics and identify possible memory issues. Interesting enough, we found this was an approach that has been used by Loreena Lee at the Gmail team for a long time to solve memory issues. A walkthrough for this approach:
- Open Chrome DevTools and visit
chrome://inspect. - Click on the
inspectbutton from one of your applications in the Remote Target section located at the bottom.
Note: Make sure you have the Inspector attached to the Node.js application you want to profile. You can also connect to Chrome DevTools using ndb .
You are going to see a Debugger Connected message in the output of your console when the app is running.
- Go to Chrome DevTools > Memory
- Take a heap snapshot
In this case, we took the first snapshot without any load or processing being done by the service. This a tip for certain use-cases: it’s fine if we are completely sure the application doesn’t require any warm up before accepting request or do some processing. Sometimes it makes sense to do a warm-up action before taking the first heap snapshot as there are cases where you might be doing lazy initialization for global variables on the first invocation.
- Perform the action in your app that you think is causing leaks in memory.
In this case we are going to run npm run load-mem. This will start ab to simulate traffic/load in your Node.js application.
- Take a heap snapshot
- Again, perform the action in your app that you think is causing leaks in memory.
- Take a final heap snapshot
- Select the latest snapshot taken.
- At the top of the window, find the drop-down that says “All objects” and switch this to “Objects allocated between snapshots 1 and 2”. (You can also do the same for 2 and 3 if needed). This will substantially cut down on the number of objects that you see.
The Comparison view can help you identify those Objects too:
In the view you’ll see a list of leaked objects that are still hanging around, top level entries (a row per constructor), columns for distance of the object to the GC root, number of object instances, shallow size and retained size. You can select one to see what is being retained in its retaining tree. A good rule of thumb is to first ignore the items wrapped in parenthesis as those are built-in structures. The @ character is objects’ unique ID, allowing you to compare heap snapshots on per-object basis.
A typical memory leak might retain a reference to an object that’s expected to only last during one request cycle by accidentally storing a reference to it in a global object that cannot be garbage collected.
This example generates a random object with the date timestamp when the request was made to imitate an application object that might be returned from an API query and purposefully leak it by storing it in a global array. Looking at a couple of the retained Object’s you can see some examples of the data that has been leaked, which you can use to track down the leak in your application.
NSolid is great for this type of use-case, because it gives you a really good insight of how memory is increasing on every task or load-test you perform. You can also see in real time how every profiling action impacts CPU if you were curious.
In real world situations, memory leaks happen when you are not looking at the tool you use to monitor your application, something great about NSolid is the ability to set thresholds and limits for different metrics of your application. For example, you can set NSolid to take a heap snapshot if more than X amount of memory is being used or during X time memory hasn’t recovered from a high consumption spike. Sounds great, right?
Marking and Sweeping
V8’s garbage collector is mainly based on the Mark-Sweep collection algorithm which consists of tracing garbage collection that operates by marking reachable objects, then sweeping over memory and recycling objects that are unmarked (which must be unreachable), putting them on a free list. This is also known as a generational garbage collector where objects may move within the young generation, from the young to the old generation, and within the old generation.
Moving objects is expensive since the underlying memory of objects needs to be copied to new locations and the pointers to those objects are also subject to updating.
For mere mortals, this could be translated to:
V8 looks recursively for all objects’ reference paths to the Root node. For example: In JavaScript, the "window" object is an example of a global variable that can act as a Root. The window object is always present, so the garbage collector can consider it and all of its children to be always present (i.e. not garbage). If any reference has no path to the Root node. especially when it looks for unreferenced objects recursively, it will be marked as garbage and will be swept later to free that memory and return it to the OS.
However, modern garbage collectors improve on this algorithm in different ways, but the essence is the same: reachable pieces of memory are marked as such and the rest is considered garbage.
Remember, everything that can be reached from a Root is not considered garbage. Unwanted references are variables kept somewhere in the code that will not be used anymore and point to a piece of memory that could otherwise be freed, so to understand the most common leaks in JavaScript, we need to know the ways references are commonly forgotten.
The Orinoco Garbage Collector
Orinoco is the codename of the latest GC project to make use of the latest and greatest parallel, incremental and concurrent technique for garbage collection, featuring the ability to free the main thread. One of the significant metrics describing Orinoco’s performance is how often and how long the main thread pauses while the garbage collector performs its functions. For classic ‘stop-the-world’ collectors, these time-intervals impact the application’s user experience due to delays, poor-quality rendering, and an increase in response time.
V8 distributes the work of garbage collection between auxiliary streams in young memory (scavenging). Each stream receives a set of pointers, followed by moving all living objects into “to-space”.
When moving objects into ‘to-space’, threads need to synchronize through atomic read / write / compare and swap operations to avoid a situation where, for example, another thread found the same object, but followed a different path, and tries to move it.
Quote from V8 page:
Adding parallel, incremental and concurrent techniques to the existing GC was a multi-year effort, but has paid off, moving a lot of work to background tasks. It has drastically improved pause times, latency, and page load, making animation, scrolling, and user interaction much smoother. The parallel Scavenger has reduced the main thread young generation garbage collection total time by about 20%–50%, depending on the workload. Idle-time GC can reduce Gmail’s JavaScript heap memory by 45% when it is idle. Concurrent marking and sweeping has reduced pause times in heavy WebGL games by up to 50%.
The Mark-Evacuate collector consists of three phases: marking, copying, and updating pointers. To avoid sweeping pages in the young generation to maintain free lists, the young generation is still maintained using a semi-space that is always kept compact by copying live objects into “to-space” during garbage collection. It's advantage being parallel is that ‘exact liveness’ information is available. This information can be used to avoid copying by just moving and relinking pages that contain mostly live objects, which is also performed by the full Mark-Sweep-Compact collector. It works by marking live objects in the heap in the same fashion as the mark-sweep algorithm, meaning the heap will often be fragmented. V8 currently ships with the parallel Scavenger which reduces the main thread young generation garbage collection total time by about 20%–50% across a large set of benchmarks.
Everything related to pausing of the main thread, response time and page load has significantly improved, which allows animations, scrolling and user interaction on the page to be much smoother. The parallel collector made it possible to reduce the total duration of processing of young memory by 20–50%, depending on the load. However, the work is not over: Reducing pauses remains an important task to simplify the lives of web users, and we continue to look for the possibility of using more advanced techniques to achieve the goal.
Conclusions
Most developers don’t need to think about GC when developing JavaScript programs, but understanding some of the internals can help you think about memory usage and helpful programming patterns. For example, given the structure of the heap in V8, based on generations, low-living objects are actually quite cheap in terms of GC, since we pay mainly for the surviving objects. This kind of pattern is not only particular to JavaScript but also to many languages with garbage collection support.
Main Takeaways:
- Do not use outdated or deprecated packages like node-memwatch, node-inspector or v8-profiler to inspect and learn about memory. Everything you need is already integrated in the Node.js binary (especially a node.js inspector and debugger). If you need more specialized tooling, you can use NSolid, Chrome DevTools and other well known software.
- Consider where and when you trigger heap snapshots and CPU profiles. You will want to trigger both, mostly in testing, due to the intensity of CPU operations that are required to take a snapshot in production. Also, be sure of how many heap-dumps are fine to write out before shutting the process and causing a cold restart.
- There’s no one tool for everything. Test, measure, decide and resolve depending on the application. Choose the best tool for your architecture and the one that delivers more useful data to figure out the issue.
References
- Memory Management Reference
- Trash talk: the Orinoco garbage collector v8-perf
- Taming The Unicorn: Easing JavaScript Memory Profiling In Chrome DevTools
- JavaScript Memory Profiling
- Memory Analysis 101
- Memory Management Masterclass
- The Breakpoint Ep. 8: Memory Profiling with Chrome DevTools
- Thorsten Lorenz - Memory Profiling for Mere Mortals
- Eliminating Memory Leaks in Gmail

This article was first published in NodeSource blog on March 2017.
The package.json file is core to the Node.js ecosystem and is a basic part of understanding and working with Node.js, npm, and even modern JavaScript. The package.json is used as what equates to a manifest about applications, modules, packages, and more - it's a tool to that's used to make modern development streamlined, modular, and efficient.
As a developer in the Node.js ecosystem, understanding the basics of package.json is one of the first steps to really kicking off your development experience with Node.js.
Because of how essential understanding the basics of package.json is to development with Node.js, I've gone through and outlined some of the most common and important properties of a package.json file that you'll need to use package.json effectively.
Identifying Metadata Inside package.json
The name property
The name property in a package.json file is one of the fundamental components of the package.json structure. At its core, name is a string that is exactly what you would expect - the name of the module that the package.json is describing.
Inside your package.json, the name property as a string would look something like this:
"name": "metaverse"
Despite having only a few material restrictions (a max length of 214 characters, can't begin with . or _, no uppercase letters, and no characters that aren't URL-friendly), one interesting aspect of the name property is that, there have been software ecosystems that have developed standard naming conventions that enable discoverability simply by using the name property.
A few examples of this kind of namespacing are babel-plugin- for Babel and the the webpack -loader tooling.
The version property
The version property is a key part of a package.json, as it denotes the current version of the module that the package.json file is describing.
While the version property isn't required to follow semver, semver is the standard used by the vast majority of modules and projects in the Node.js ecosystem - and the module version, according to semver, is what you'll typically find in the version property of a package.json file.
Inside your package.json, the version property as a string using semver could look like this:
"version": "5.12.4"
The license property
The license property of a package.json file is used to note what license the module that the package.json file is describing. While there are some complex ways you can use the license property of a package.json file (to do things like dual-licensing or defining your own license), the most typical usage of it is to use a SPDX License identifier - some examples that you may recognize are MIT, ISC, and GPL-3.0.
Inside your package.json, the license property with an MIT license look like this:
"license": "MIT"
The description property
The description property of a package.json file is a string that contains a human-readable description about the module - basically, it's the module developer's chance to quickly let users know what exactly a module does. The description property is frequently indexed by search tools like npm search and the npm CLI search tool to help find relevant packages based on a search query.
Inside your package.json, the description property would look like this:
"description": "The Metaverse virtual reality. The final outcome of all virtual worlds, augmented reality, and the Internet."
The keywords property
The keywords property inside a package.json file is, as you may have guessed, a collection of keywords about a module. Keywords can help identify a package, related modules and software, and concepts.
The keywords property is always going to be an array, with one or more strings as the array's values - each one of these strings will, in turn, be one of the project's keywords.
Inside your package.json, the keywords array would look something like this:
    "keywords": [
        "metaverse",
        "virtual reality",
        "augmented reality",
        "snow crash"
    ]
Functional Metadata Inside package.json
The main property
The main property of a package.json is a direction to the entry point to the module that the package.json is describing. In a Node.js application, when the module is called via a require statement, the module's exports from the file named in the main property will be what's returned to the Node.js application.
Inside your package.json, the main property, with an entry point of app.js, would look like this:
"main": "app.js",
The repository property
The repository property of a package.json is an array that defines where the source code for the module lives. Typically, for open source projects, this would be a public GitHub repo, with the repository array noting that the type of version control is git, and the URL of the repo itself. One thing to note about this is that it's not just a URL the repo can be accessed from, but the full URL that the version control can be accessed from.
Inside your package.json, the repository property would look like this:
  "repository": {
      "type": "git",
      "url": "https://github.com/bnb/metaverse.git"
  }
The scripts property
The scripts property of a package.json file is simple conceptually, but is complex functionally to the point that it's used as a build tool by many.
At its simplest, the scripts property takes an object with as many key/value pairs as desired. Each one of the keys in these key/value pairs is the name of a command that can be run. The corresponding value of each key is the actual command that is run. Scripts are frequently used for testing, building, and streamlining of the needed commands to work with a module.
Inside your package.json, the scripts property with a build command to execute node app.js (presumably to build your application) and a test command using Standard would look like this:
    "scripts": {
        "build": "node app.js",
        "test": "standard"
    }
The dependencies property
The dependencies property of a module's package.json is where dependencies - the other modules that this module uses - are defined. The dependencies property takes an object that has the name and version at which each dependency should be used. Tying things back to the version property defined earlier, the version that a module needs is defined. Do note that you'll frequently find carets (^) and tildes (~) included with package versions. These are the notation for version range - taking a deep-dive into these is outside the scope of this article, but you can learn more in our primer on semver.
Inside your package.json, the dependencies property of your module may look something like this:
  "dependencies": {
    "async": "^0.2.10",
    "npm2es": "~0.4.2",
    "optimist": "~0.6.0",
    "request": "~2.30.0",
    "skateboard": "^1.5.1",
    "split": "^0.3.0",
    "weld": "^0.2.2"
  },
The devDependencies property
The devDependencies property of a package.json is almost identical to the dependencies property in terms of structure, with a key difference. The dependencies property is used to define the dependencies that a module needs to run in production. The devDependencies property is usually used to define the dependencies the module needs to run in development.
Inside your package.json, the devDependencies property would look something like this:
    "devDependencies": {
        "escape-html": "^1.0.3",
        "lucene-query-parser": "^1.0.1"
    }
Want to keep going?
If you want to keep learning about Node.js, npm, package.json, and development with the Node.js stack, I've got some awesome articles for you.
We also have a guide on some great utilities for Node.js developers - if you want to kick your developer experience to 11, be sure to check it out to find some tools to help you get there.
The goal with this guide was to help kickstart you with package.json for development with Node.js and npm. If you want to take the leap and ensure that you're always on solid footing with Node.js and npm modules, you should check out NodeSource Certified Modules - an awesome tool to help ensure that you spend more time building applications and less time worrying about modules.

Node.js 14 has just been released. It comes with full of new features and enhancements. More importantly, it will be promoted to Long-Term Support in October, so now it's the moment to start testing our applications and try the new features to ensure a smooth transition.
In this webinar we will be showing the most relevant of these new features.
Read More
In this volume of Need to Node, you can find the latest news on Node.js’s version 14 Release, Diagnostics in Node.js and The Cost of JavaScript Frameworks
Need to Node is a weekly bulletin designed to keep you up-to-date with the latest news on the Node.js project, events and articles. You are always welcome to collaborate and participate. Please let us know if we missed a piece of content you think should be included!
What’s New in the Node.js Project
-
Node.js version 14 Released — Woo-hoo it’s finally here! Node.js v.14 now becomes the current release line with it becoming a LTS (Long Term Support) release in October. It’s recommended to keep using Node.js version 12 for now. Some of the most exciting features include:
- Diagnostic Report goes Stable
- V8 upgraded to V8 8.1
- Experimental Async Local Storage API
- Improvements to Streams.
- Experimental WebAssembly System Interface (WASI) to support future WebAssembly use cases.
- Removal of Experimental Modules Warning (but it still is experimental).
Awesome Articles, Links, and Resources
- Diagnostics in Node.js Part 2, useful techniques for diagnostics in Node.js - by lizparody
- ZEIT is now Vercel This new identity aligns with their new focus — to provide the ultimate workflow for developing, previewing, and shipping Jamstack sites. They also raised $21M in Series A funding.
- npm trends a useful tool to compare package downloads counts over time. By John Potter
- Lazy npm A simple terminal UI for npm commands. By Jesse Duffield
-
The Cost of JavaScript Frameworks. With JavaScript you end up paying a performance tax no less than four times:
- The cost of downloading the file on the network
- The cost of parsing and compiling the uncompressed file once downloaded
- The cost of executing the JavaScript
- The memory cost Read this blog post to find out more! By Tim Kadlec
- Recommended GitHub Integrations for 2020 IDE integrations, GitHub bots, issue trackers and much more — to help you make the most out of GitHub. By Fernando Doglio
- 8 Basic Coding Conventions Every Developer Needs To Practice. Including: spaces vs tabs, naming conventions and practice proper directory structure. By Ann Adaya
One Last Thing...
If you find any Node.js or JavaScript related content over the next week (or beyond!), never hesitate to reach out to us on Twitter at @NodeSource to share and get it included in Need to Node - our DMs are open if you don’t want to share publicly!
Read More